
Same Day Emergency Appointments Available!

Veneer Placement in Springfield, NJ
Union, NJ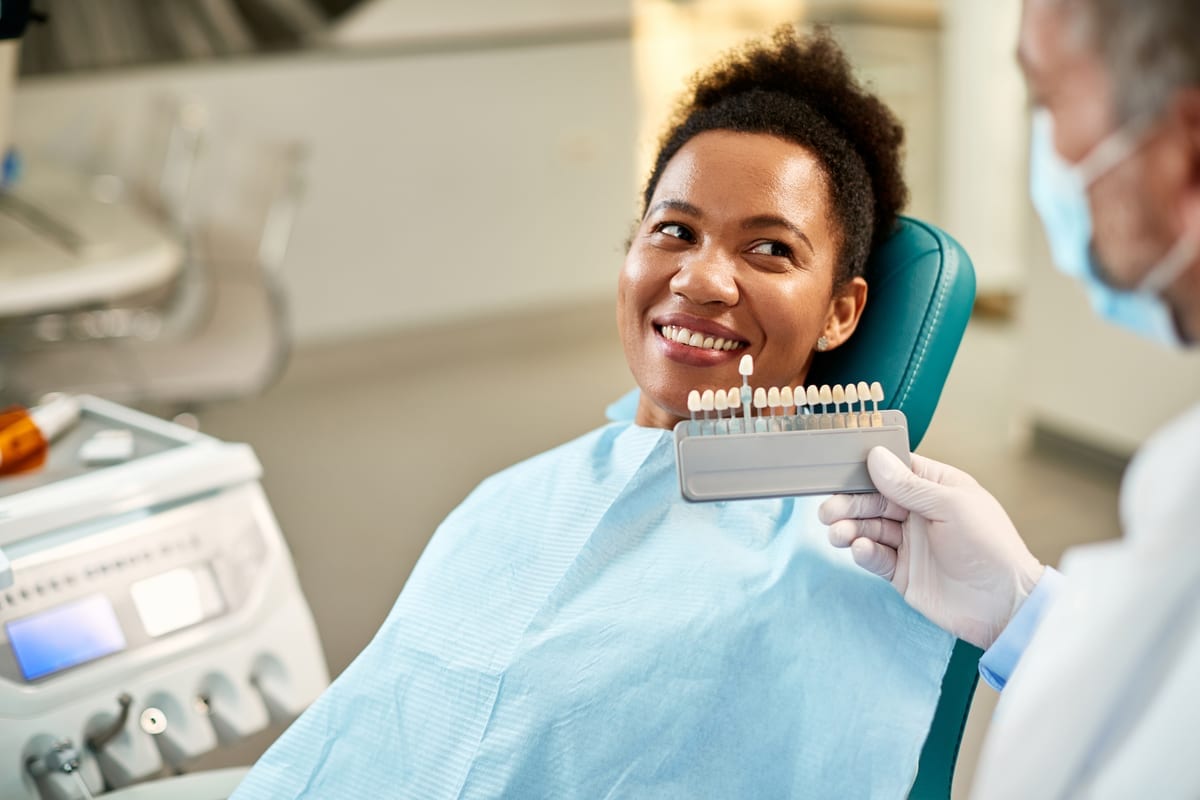
If you’ve been curious about what happens to your tooth during veneer placement in Springfield, you’re not alone. Many patients want to understand exactly what the process involves before committing. At Duo Dental Group Union, Dr. Richard Mullin guides every patient through each step clearly and comfortably. Knowing what to expect helps you feel confident walking into your appointment.
Starting With a Veneer Consultation in Springfield
The journey begins with a thorough consultation. Dr. Mullin examines your teeth, gums, and overall oral health before recommending veneers. This step ensures veneers are the right solution for your specific goals. Patients with active gum concerns may first need to address Periodontal Disease Treatment Gum Disease before moving forward with cosmetic work.
During the consultation, you’ll discuss the look you want to achieve. Dr. Mullin reviews shade options, tooth shape, and length. He uses digital imaging to help you visualize potential results. This is also the time to ask every question on your mind.
X-rays may be taken to assess the health of the underlying tooth structure. Veneers require a healthy foundation to bond properly. If any decay or structural issues exist, those are addressed first. Only then does the cosmetic process begin.
What Happens to the Tooth Surface Before Placement
One of the most important steps in veneer placement involves preparing the tooth surface. Dr. Mullin gently removes a thin layer of enamel from the front of the tooth. This removal is usually about 0.5 millimeters — roughly the thickness of a contact lens. It creates space for the veneer to sit flush with neighboring teeth.
This step is permanent, which is why the consultation matters so much. Removing enamel is irreversible, so you should feel fully informed before proceeding. Local anesthesia is used to keep you comfortable throughout this process. Most patients report feeling very little discomfort during enamel preparation.
After the enamel is shaped, Dr. Mullin takes a precise impression of the tooth. This impression is sent to a dental lab. Skilled technicians use it to craft your custom veneer. The process typically takes one to two weeks.
The Temporary Veneer Phase
While your permanent veneers are being created, you’ll wear temporary veneers. These protect the prepared teeth and give you a preview of your final smile. Temporaries are not as strong as permanent veneers, so some care is required. Avoid hard, sticky, or crunchy foods during this phase.
Temporary veneers are bonded with a lighter adhesive than permanent ones. This allows Dr. Mullin to remove them easily at your follow-up appointment. They may feel slightly different from your natural teeth. That’s completely normal and expected.
This phase also gives patients a chance to provide feedback. If you want adjustments to the shape or length, now is the ideal time to speak up. Dr. Mullin welcomes input before the final veneers are placed. Your satisfaction drives every decision made.
Shade Selection and What It Involves
Choosing the right shade is one of the most exciting parts of the process. Dr. Mullin uses a professional shade guide to compare options against your natural teeth. The goal is a result that looks beautiful and natural. Most patients prefer a shade that brightens their smile without looking artificial.
Key factors that influence shade selection include:
- Your skin tone and facial features
- The shade of surrounding natural teeth
- How much brightening you want to achieve
- The translucency of the veneer material chosen
Porcelain veneers mimic the light-reflecting properties of natural enamel. This gives them a realistic, lifelike appearance. Composite veneers are another option but differ in durability and appearance. Dr. Mullin explains the differences so you can choose what fits your goals best.
Final Bonding: The Last Step in Veneer Placement
When your custom veneers arrive from the lab, you return for the bonding appointment. Dr. Mullin places each veneer on the tooth temporarily to check fit, color, and shape. Adjustments are made before the permanent bond is applied. Getting this step right is essential for a long-lasting result.
The tooth surface is cleaned and slightly etched to improve adhesion. A special dental bonding cement is applied to the veneer. The veneer is then pressed carefully onto the tooth. A curing light hardens the cement within seconds.
Here’s what the final bonding appointment typically involves:
- Checking the fit and color of each veneer
- Cleaning and etching the tooth surface
- Applying dental bonding cement precisely
- Using a curing light to harden the bond
- Polishing and making any final bite adjustments
After bonding, Dr. Mullin checks your bite carefully. Minor adjustments ensure your veneers feel natural when you speak and chew. A follow-up appointment may be scheduled to confirm everything has settled properly. Most patients leave this appointment smiling with confidence.
Caring for Your Smile After Veneer Placement in Springfield
Veneers are durable, but they do require proper care. Brush gently with a non-abrasive toothpaste twice daily. Floss carefully to protect the edges of each veneer. Regular checkups with Dr. Mullin help extend the life of your veneers significantly.
Avoid biting into very hard foods like ice or hard candy. If you grind your teeth at night, a custom night guard can protect your veneers. Good oral hygiene habits help veneers last ten to fifteen years or more. Keeping your gum tissue healthy is equally important for long-term results.
Families interested in building healthy habits early may also want to explore Pediatric Dentistry services for younger members of the household. Prevention starts at any age, and our team is here to support every smile in your family. Good dental habits formed early often lead to fewer cosmetic concerns down the road.
If you’re ready to learn more about what happens to your tooth during veneer placement in Springfield, Dr. Mullin and the team at Duo Dental Group Union are here to guide you. Every patient deserves a clear, honest explanation before making any decision. Book Now to schedule your appointment with our team.
Frequently Asked Questions
Does veneer placement hurt?
Most patients experience little to no discomfort during veneer placement. Local anesthesia is used during the enamel preparation step to keep you comfortable. After the appointment, mild sensitivity may occur for a few days. This typically resolves on its own.
How much enamel is removed for veneers?
Dr. Mullin removes approximately 0.5 millimeters of enamel from the front surface of the tooth. This is a very thin amount — similar to the thickness of a contact lens. It creates space for the veneer to fit naturally without looking bulky.
How long does the entire veneer process take?
The full process usually spans two to three appointments over two to four weeks. The first visit covers consultation and tooth preparation. The second visit places temporary veneers. The final visit bonds your permanent veneers in place.
Are dental veneers reversible?
Veneers are considered a permanent treatment because enamel removal cannot be undone. Once the enamel is prepared, the tooth will always need some form of coverage. This is why Dr. Mullin spends significant time during the consultation ensuring veneers are the right choice for you.
How long do veneers last?
With proper care, porcelain veneers typically last between ten and fifteen years. Composite veneers may need replacement sooner, around five to seven years. Avoiding hard foods, grinding habits, and maintaining regular dental visits all help extend their lifespan considerably.
New Patients & Emergency Appointments Welcome!